The Haven Hammock Tent
Since moving to Idaho, I have gone backpacking in the mountains several times. Due to some medical issues I have not gotten out as much as I would have liked, but I have spent enough nights out in the wilderness to know that the terrain in this state is more rugged than anyplace else I have ever backpacked. In some of these mountain ranges, you can walk for miles without finding a place that is even partially flat, and even then you wind up looking around for the least-worst almost-flat place where you won’t spend the entire night sliding downhill and trying to scootch back up.
I had gotten recommendations from several people to try using a hammock. Most of the mountains here are heavily forested, and having a hammock would exponentially increase the number of possible campsites. The problem is that I have never been able to be comfortable in one. I finally decided that this year I would at least research what was available. Much to my surprise, after reading a bunch of “Top Ten” and “Best of …” type reviews and not seeing anything I liked, I stumbled across a product that is so new (initially Kickstarter-funded in September 2019) that it hasn’t even hit the radar of the mainstream reviewers. Owners rave about it, though, and after reading everything I could find and watching a couple of dozen YouTube reviews and how-to videos, I took the plunge and ordered one.
My Haven XL arrived yesterday, so of course I had to go out in the backyard and set it up. It really does lay flat - it is amazingly comfortable to lie down in! It comes with its own rainfly, but based on several reviews and just thinking about how I would be likely to use it, I also ordered a OneWind Billow hammock tarp. This will give me more room than the included tarp, assuming it works as seen on YouTube. 🙂. I did not have time to set that up before dark, so for the first night it was configured as shipped from Haven.
I slept out in it Thursday night (23-24 Feb), which proved to be a real acid test. It was 8° F when I came in from setting it up Thursday evening, and the forecast said it would be 3° by morning. ❄️🌬️🥶
The Haven has an insulated air mattress with an R4 rating which is part of the structure that helps give its “lay flat” capability. I put a space blanket under the mattress to try to minimize radiant heat loss, and I took an Army-issue closed-cell foam pad out with me in case I woke up with CBS (Cold Butt Syndrome) and needed even more insulation underneath me.
My Western Mountaineering Badger sleeping bag is rated to 15° F, but l also had long underwear, socks, a sleep cap, wristovers, etc. so I was not concerned. I usually sleep pretty warm, and wind up unzipping the bag and taking things off to cool down. So this was a controlled experiment, with plenty of past winter camping experience against which to compare.
My attitude going in was that regardless of whether it turned out to be warm enough for winter, I am very impressed with this product, and am really looking forward to using it on my backpacking trips this year. Looking back on all the nights I have slept out while backpacking since coming to Idaho, over 90% of them would have been substantially simplified and almost certainly more comfortable had I been able to just set up between two trees rather than having to scout around looking for a flat spot on the ground. 🤞
After spending a fulI night out in the hammock I’d call the first try a “qualified success”. I was able to stay warm and comfortable for most of the night, and learned a lot about how the hammock works (and what doesn't).
First, a few more detailed notes about the setup I used last night. The trees I selected were far enough apart that the tree straps were not long enough to use by themselves. Fortunately I had also purchased a set of "whoopie slings", which act as an adjustable extension to the tree straps. The whoopie slings loop through the tree straps at one end and attach to the hammock at the other end. There are multiple options for how to do this with or without carabiners. I had purchased some ultralight carabiners from Haven, and used them. I fiddled with the adjustments until I had the head end slightly higher than the foot end, as recommended. They tell you to set it up no more than two feet off the ground, but I think this must be lawyer-speak, because it naturally sags due to your weight. I started a little more than two feet off the ground (28"-30"), and still felt very low when sitting in it. Part of this depends on your weight and part on the angle of your straps and how long they are - I am sure I will learn to judge it effectively over time.
I am not sure, however, that I will ever get the hang of the whoopie slings. It is easy enough to see how they work, but once they were under tension I found them next to impossible to loosen again. Once or twice I got them to loosen up almost by accident, but despite watching many, many online videos about them, it was just never clear to me what part you were supposed to squeeze, where, to get them loose again. I eventually decided that I would never use these in the field, but would probably buy some additional tree straps to use as extensions if I need them.
I had inflated the air mattress inside the house to test it and to test the electric air pump, which can be used both to inflate and deflate the mattress. It worked very well, although it needed some help with deflating in order to keep air at the pump/valve end. I rolled it up from the bottom while the pump sucked out the air. The mattress also comes with a stuff sack that is supposed to be usable as a pump to inflate it, but I haven't tried that yet. The electric pump is a very nice convenience, but I seriously doubt if I would take it backpacking. I see no need for the extra weight - I was a swimmer in high school and still have pretty good lungs, so I expect that I'll just blow it up manually (orally). I took the mattress outside in a deflated state, and inflated it outside so it would be filled with cold air. The pump gets it most of the way, but it still takes a couple breaths to get it really full and rigid (as needed for the structural integrity of the hammock). I topped it off with a couple of breaths, and after that air had cooled, a couple more to make it really stiff. I tucked the corners of the mattress under the little retaining flaps, which look smaller than I remembered from the video. As I mentioned above, I put a folded-in-half space blanket underneath to act as an additional barrier to radiant heat loss. This was a little oversized, but I got it all spread out and tucked securely underneath the air mattress.
 |
| Hammock and air mattress without the bug net or rainfly. |
I attached the included Haven Rainfly using the same carabiners that held up the hammock, as shown in their videos. It took me a few tries to figure out the best way to do this. Ideally, I think it should be attached before the hammock is strung up. At first I was going to stake out the corners with guylines, but then I decided to use it in "storm mode" due to the extreme cold and the likelihood that I'd want to "button up" for warmth. I attached the upwind side to the corner toggles, but left the downwind side unattached and flipped over the ridge line so I could see the sky.
 |
| The rainfly attaches to the same ridgeline as the hammock. |
 |
| Hammock with rainfly attached on one side and flipped over the top. The droopy white strip is the ridge light, which I had not yet learned how to attach securely. |
 |
| Hammock with rainfly attached in "storm mode". |
A note about construction: The hammock and accessories appear to be going through a continuous improvement process, as several details are different than what I have seen in various videos. The rainfly I received does not have grommets for the toggle. Instead, it has buttonholes much like the ones at the top used to attach it to the carabiners. This may perhaps be stronger, but in practice it was very, very hard to attach, and effectively impossible to attach while laying in the hammock. Perhaps this was due to the cold, but I think grommets would have been *much* easier to get the toggles though. If I ever use it again, I may actually put grommets at the corners. (More on "if I ever use it again" later in this review).
 |
| The corner of the rainfly attached to the toggle on the hammock. |
When I first lay down in the hammock, it was comfortable but felt a bit confining, pressing in on my shoulders and kind of wrapping around me. This was disappointing, as a big selling point of the Haven is that it does not do this, at least not as much as other designs. It didn't take me long to realize that I had completely forgotten the spreader bars! (In my defense, it was getting dark and I'd overlooked them). Once I had those installed it was a complete game changer. It really did lay flat and was quite comfortable and roomy.
When I went outside for the night, I had my normal clothing and pocket contents (including a phone) and carried a few things with me for the night: an insulated water bottle, headlamp, iPad mini, my pistol in its Wilderness Safepacker (always need to know where that is going to go while I sleep), down booties for nighttime forays outside to pee, and the charging case for my hearing aids. All but the water bottle and pistol fit easily into the net pockets (booties at the foot end, the rest of it around my head), then my cap and water bottle by one shoulder and the Wilderness Safepacker by the other.
To get into the hammock, the easiest way is to just sit down in the middle of it, as far back as you can manage to sit. Reach up and grasp the ridge line as a handhold, and then sort of lift yourself up and pivot your feet in. It didn't take me long to do this and get situated on top of the (unzipped) sleeping bag. My boots were outside on the ground, with a stuff sack over the top of them to keep out snow, critters, etc. Lots of this is SOP for me as I often sleep without a tent whenever the weather permits. I usually have either a bivy or a tarp for weather protection. I only recently started carrying a tent, mostly for bug protection. So I'm used to keeping things packed or covered to protect them from weather.
Now was when the fun began! I started to get undressed to settle in for the night. My usual practice is to sit down on the open sleeping bag, take off my pants and slide my legs in, then fold the pants and lay them flat in a stuff sack. This slides under my knees for support/insulation (I normally use a half-length pad). Then I take off my various upper body layers. These all get folded together either inside a stuff sack (in fair weather) or inside the parka, which is then closed, folded over half way, and positioned as a pillow. There are variations on this theme, but the essence is the same.
Perhaps I might have been able to do this had I been experienced with sleeping in a hammock, but this time I found it impossible to do. Every movement caused me either to bounce up and down or swing/tilt side to side, and I just couldn't do it. I finally just got up, undressed standing up, put everything where it belonged, and then got back in the hammock and zipped into the mummy bag. In order to do this, I unrolled the sleeping pad I'd brought out "just in case" and used it to stand on. Then I left it there unrolled, kind of like a front porch. Usually my space blanket serves this function (among its many uses), but since it was already under the air mattress their roles were reversed. Once I got settled in around 2230, I was very comfortable. I read for awhile, and then decided it was time to go to sleep, which I did with no trouble.
To put the rest of the night in perspective, a few facts about me: I am a big guy (6'3" and 245 lb.). The Haven XL is rated for 280 or 285 lb., depending on where you look on the Haven website. Haven has a video showing them overloading it with 3 or 4 guys and a bunch of stuff to show how tough it is, but the rated maximum weight is such that I only have 35-40 lb. of leeway - it seriously sags when I sit down in it. And I will never be able to put my pack inside. Between my sleeping bag, clothing, and the few small things I mentioned, I am probably pretty darn close to the maximum rated weight. So I was really pushing the envelope on this sleep system in terms of both weight *and* temperature.
Furthermore: I am 64 years old and am a retired Army officer. I have kept myself in good shape all my life, but I've been "rode hard and put away wet" quite a few times, and the past few years have seen some of the bills coming due. Most significantly, in June 2020 I had five vertebrae in my lower back fused, so now I have all sorts of pins, screws, and rods in there, and I am not nearly as flexible as I used to be. That took a year to recover from, but I was back on the trail in 2021 and had some fun adventures (described elsewhere in this blog). Fast forward to now - I had another surgery on 20 December, and was absolutely forbidden to do any kind of exercise "for at least two months". So Tuesday 21 Feb was my first stretching/workout session of any kind other than simple walking - some stretches, squats, pushups, bridging, a few reps of the ab wheel, etc - nothing really extreme, but the first I had done in two months. I was pretty stiff Wednesday so I skipped it and just stretched. I was lazy again on Thursday morning, then went out that night to sleep in the Haven for the first time.
Not being familiar with the Haven nor with hammock use in general, I was reaching around, putting things in the various mesh pockets, adjusting and shifting to get comfortable, etc. Plus, I had to get up several times in the night for visits to the nearest tree (another fun aspect of getting older). Getting out of the hammock is not that hard. You can just reverse the process of getting in, reaching up for the ridge line to pull up to a sitting position, then pivoting out to get your feet on the ground. Sometimes I found it easier to just sort of roll out onto my knees and stand up from there. What was hard was to reach down to the mesh pocket at the foot end to get the down booties. I did that the first time, made the trip out and back, and then decided to just leave them on inside the sleeping bag for extra warmth. My feet had already been feeling not-quite toasty, and it wasn't the coldest part of the night yet.
One thing I noticed was that getting in and out had a tendency to shift the air mattress towards the opposite side. I think this was at least in part due to the fact that the space blanket is pretty slick, so it was easier for the mattress to slide. Haven has a video showing how to lift your weight off the middle of the mattress and wiggle around to get it to shift back to the middle. The technique works, but is quite a workout for the abs. It's essential for comfortable sleep to keep the mattress in the middle - if it's not confined within the support arcs, it tilts and the whole structure is compromised and uncomfortable. I got to where I could get in and out without disturbing the position too much. But when I started to try to adjust the rainfly, that was another story.
I started out the night with it half open to the night sky (and the bug net completely removed). When I woke up at 0230, however, I was starting to feel the cold a bit - there was enough air movement that I thought it would be better to close myself inside in "storm mode", with the rainfly fastened at the corners. I already had two of the corners fastened down. I quickly realized that it would be easier to fasten the foot corner on what I came to think of as the "door side" while I was still outside, before climbing in. This meant I would only have one corner to fasten once I was inside. (I also got my down vest out and put it on at this time, as it was seriously cold and I thought I might need it as it continued to get colder in the wee hours). Once I was back inside, I started trying to fasten the last corner of the rain fly by my head to the toggle on the corner of the hammock, as well as to put the clip on the middle of the edge of the rain fly through the corresponding loop on the hammock. Both of these proved *very* challenging to do while laying in the hammock. After a protracted struggle, I managed to get the center clip attached. Once attached, it is very secure, but *really* hard to get hooked onto the little loop while your weight is in the hammock.
 |
| The clip on the center of the edge of the rainfly. |
As for the toggle on the corner, I found it impossible to attach. For one thing, there's just no way to get both hands over there without falling out of the hammock (at least for the clip in the middle I could use both hands). I resorted to just trying to get the toggle through the loop that's designed for the guy line. After awhile I figured out a way to do that one-handed, but it eventually came loose every time. (As an aside, I was a little surprised that my fingers never got numb during all of this, despite the cold - I was working so hard that my circulation was probably in overdrive, lol). Fortunately there was no appreciable wind, just a gentle breeze that had been slowly sapping my warmth away. Between the mostly-closed-in rainfly and the down vest, I felt much warmer - not sure which had the biggest effect.
I got up one more time at 0430, and got myself back in bed and battened down with a little less trouble than the first time (but still a workout). I felt very warm and comfortable in the mummy bag once I was all settled and zipped back in. When I awoke at 0630, it was a different story. By then it had gotten down to 4°F, and I could definitely feel the heat loss on my backside, all up and down. The mattress and space blanket were just not enough insulation for those conditions. Haven sells a cover/sleeve for the mattress that is supposed to double its insulating value. For this kind of camping, it would be worth it. What I decided to do for the second night was to switch the closed-cell foam pad with the space blanket. That is really more their normal role for me anyway - the pad is for added insulation in winter, and the space blanket serves as a general-purpose groundcloth, seat, work surface, and even occasionally as a windbreak, sunshade, or blanket when needed.
My only other observation vis-a-vis warmth from this first night is that there was one persistent cold spot that I found difficult to remedy. My arms just above the elbow were pretty consistently pressed against the side material by the catenary curve of the support webbing/bug net zipper, compressing the insulation and creating a cold spot. I would fold my arms across my chest or place them straight down along my sides, but invariably I'd wake up with them pressing against the sides again, and feel that cold spot. I guess this is just my personal sleeping habit, but it was an issue for me.
When I got up and got dressed at 0630, I felt stiff and sore like I'd been through a serious core workout at the gym. Despite having had several hours of really comfortable sleep, all the struggling with the tarp as well as just getting used to a hammock for the first time had really whupped me. I know that much of this was because of my inexperience and because I was out of shape after two months of inactivity. Some of my difficulties were also likely due to my size and weight - I stressed the system quite a bit. A few times during the night I even heard noises that sounded like maybe the whoopie sling or something had slipped, but I think perhaps it was just brand new materials getting stretched into shape. Somebody younger and more flexible, in better shape, and (especially) *lighter* than me would probably have a much easier time of it.
So - on balance I am a fan of the hammock, but not a fan of the rain fly. I find it hard to imagine that I will ever use it again, since I have what seems like a much better alternative - the OneWind Billow hammock tarp. This tarp is specifically designed to go over a hammock. I decided to try it the next night.
The Onewind Billow Hammock Tarp
Later on Friday I went outside, took the rainfly off of the Haven, and set up the Onewind Billow hammock tarp instead. This is a pretty neat product - I had seen a couple of different video reviews of the Haven in which the reviewers had purchased this tarp to use instead of the Haven rain fly. I liked what I saw so I bought one. It comes in different colors, but I like to be as unobtrusive as possible so I chose camouflage.
This tarp is much larger than the Haven rain fly (12'x10') with numerous tiedown points and some neat features. I spent Friday afternoon setting it up and tinkering with the different tie down points and configurations.
The tarp comes with six guy lines, four tiny carabiners, four stakes, four funky little adjustment rings, and four elastic lines attached to the corners. There are numerous reinforced tiedown loops at various places on the tarp. The configuration I chose was straight off the instruction card and videos I had watched. I used two of the guy lines as ridge lines, tying them to the tarp and using a carabiner (not included) to attach each one to the tree strap. This way the tarp has its own ridge line and is separate from and above the ridge line of the hammock. The remaining four guy lines were used to stake down the sides from the attachments points along the edges (not the corners). This left the corners flapping loose. Attaching the tiny carabiners to the elastic lines on the corners allows you to either clip them together out of the way, or else clip them across each other at the ends to close in the tarp with "doors" to keep out wind-driven rain or snow, or just minimize the breeze. I chose to leave them open for the night.
 |
| The OneWind tarp pitched open, with the side guy lines tied down to stakes and the loose corners attached to each other on the outside. |
 |
| The tarp pitched closed, with the loose corner "doors" each attached to the guy line on the opposite side. |
 |
| This tarp provides a larger protected area as well as more head room when you stand next to the hammock. I also figured out how to secure the ridge light more effectively. |
 |
| A view from inside while seated in the hammock. Due to the separate ridge lines, the hammock sags but the tarp stays higher up, providing even more headroom. Note the loose, dangling running end of the guy line. |
 |
| I could easily sit in the hammock, rest my feet under the tarp, and reach the areas on either side. This would be a good setup for cooking or whatever else you need to do while protected from the weather. |
Initially I didn't think I would trust these little elastic lines as main guy lines - they just don't seem strong enough. Staking out the corners would substantially increase the protected space in case of rain, so I thought I might add four additional guy lines to the tarp, and carry eight stakes instead of four. If I had to stay underneath the tarp for any extended length of time, I think I would like to have the extra space.
I set aside the stakes that were included with the tarp. They have multiple cutouts for the guy line up and down their length, and in one video I saw, one of the stakes had bent at a cutout. So I dug into my gear and got out eight MSR "groundhog" stakes, which are the lightest, toughest, and most secure stakes I have ever used. I also ditched the little adjustment rings for the guy lines. They don't weigh much, but I am a big fan of the tautline hitch, and use it probably more than any other knot or hitch that I know. It is excellent for its intended purpose - adjusting a taut line and then holding it in place. This can be on a tent or tarp, holding something on a roof rack, or any number of other applications where you need to be able to tighten or loosen the rope, but want it to stay taut once you've tightened it. If you don't know how to tie this knot, you owe it to yourself to learn it.
That said, I *did* use the ingenious little plastic clips that came attached to the other four tiedown points. Come to think of it, they are attached to the tarp using the same elastic line I disparaged earlier. I guess if the cord breaks in a high wind, I'll be back to threading guy lines straight through the nylon loops, but for now I really like the little plastic clips. There are actually two clips on each line - one of them is used to tighten the guy line and keep it under tension. The other one slides up and down on the elastic line, allowing you to secure the excess guy line out of the way. I also found this very useful for keeping the guy lines from becoming entangled while the tarp is folded and rolled into its stuff sack. It can be very frustrating to try to set up your tarp in the dark or in the face of a gathering storm when you take it out and the lines are all tangled up.
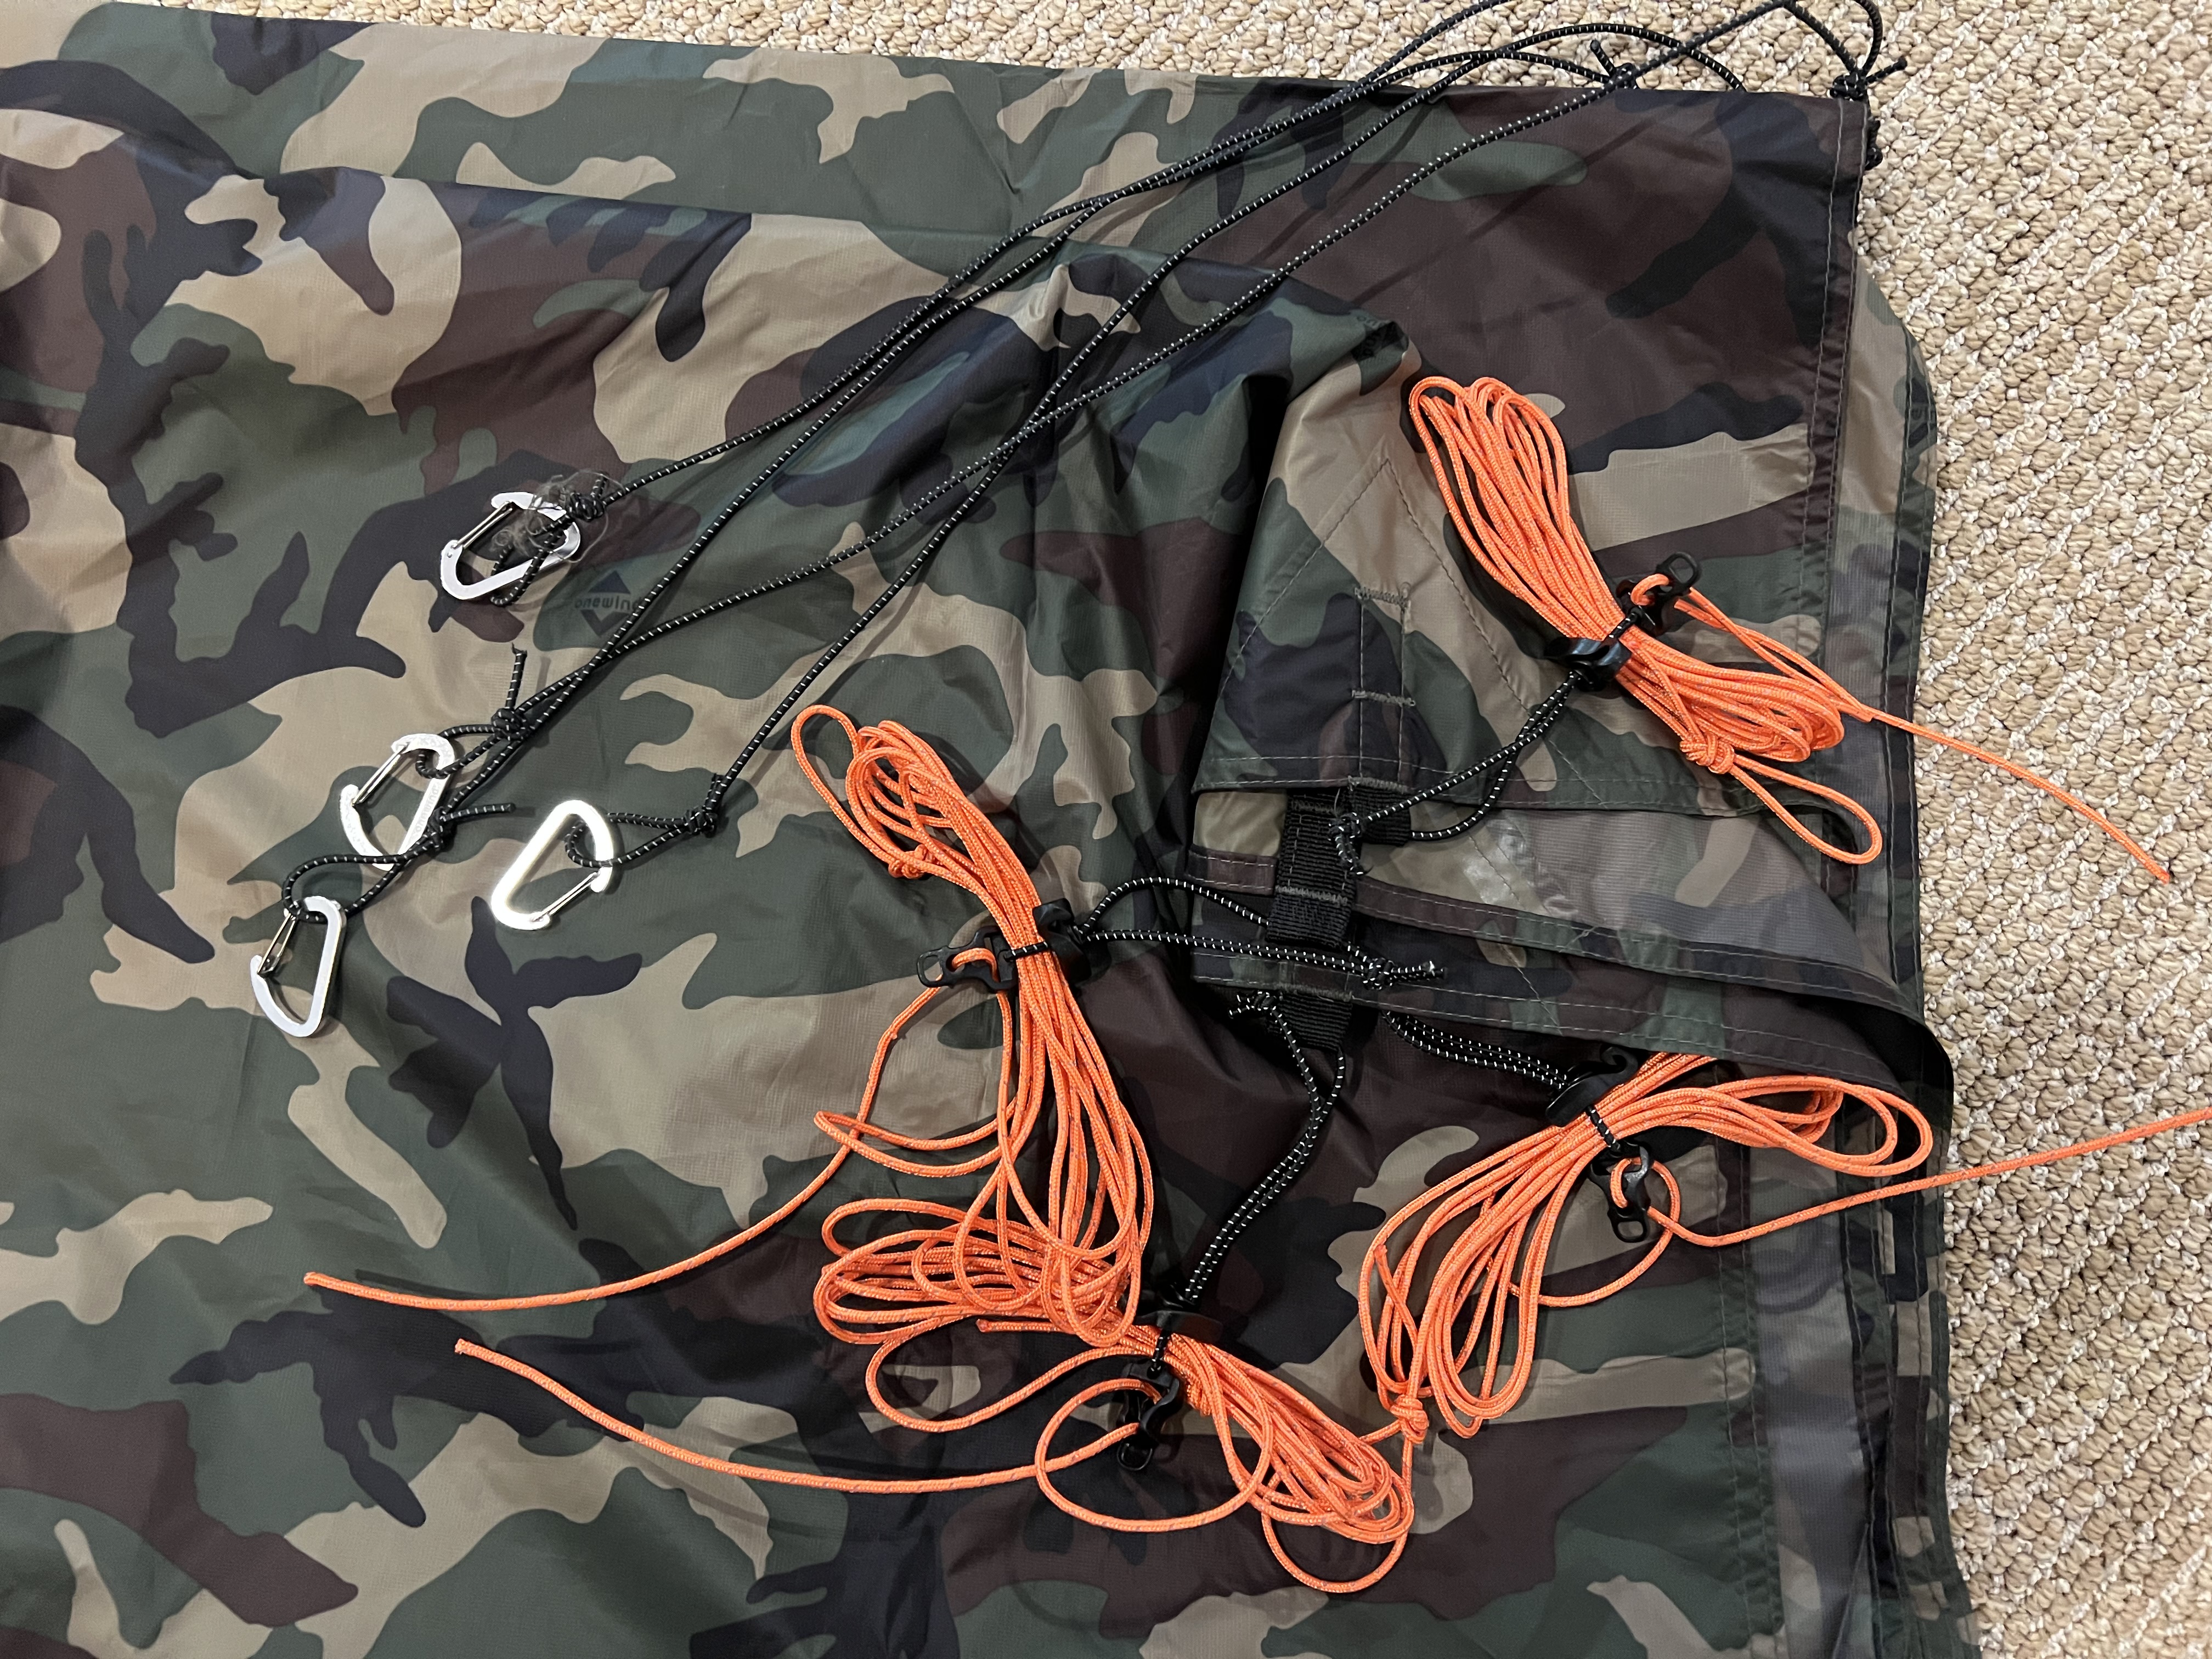 |
| This photo shows the black elastic corner lines with mini-carabiners, as well as the orange guy lines threaded through the tighteners and gathered together with the sliding retainer clips. |
 |
| This is how I keep the main ridge lines from becoming tangled when the tarp is folded and rolled for packing. It makes it very easy to hold the folded tarp under one arm while attaching the lines to trees if you have to set up in adverse conditions. |
 |
| The excess guy line running end secured with the sliding clips after the line has been tightened. Contrast this with the earlier photo. Nifty little feature! (I usually just make a quick hank with the remaining guy line, but this is quicker). |
I read for awhile and then got to sleep easily. Each time I got up in the night, I got a little better at getting in and out of the hammock without moving the mattress. I think it helped that the closed-cell foam pad is "grippier" than the space blanket. It did shift a little a couple times, but I was more practiced at getting it into place so it wasn't an issue.
I was comfortable and warm for most of the night. I never felt like I needed the down vest, although I did go into full mummy mode towards morning, and could really feel the bite of the cold air every time I opened the bag. Towards morning, I did begin to feel not-quite-toasty on my backside. The foam pad was much better than the space blanket as supplementary insulation, but still not quite adequate. I decided to buy the Haven sleeping pad cover and see if it works better. In any case it will roll up more compactly than the foam pad. If I ever camp in such extreme conditions using the hammock, I could always take along the foam pad *and* the cover.
When I woke up in the morning, I did something I used to do when I was in the Army. When we went to field training areas in the winter, we'd usually sleep on folding cots in tents that were sometimes heated, but more often not. Before going to sleep at night, I'd set up a canteen cup with a teabag in it on top of an Esbit stove, with water, fuel tablet, and matches ready at hand. In the morning, I'd unzip my sleeping bag, reach out to fill the cup with water and light the fuel tablet, and then zip back up to stay warm while the tea brewed. Then I could get dressed with a hot drink to warm my insides as well as my hands. This time I used a Toaks titanium cup instead of a canteen cup, but the effect was the same. Next time I will use spice tea (1/3 instant tea, 1/3 Tang, and 1/3 sugar). It is a more potent and tasty morning pick-me-up than just plain tea. 😋
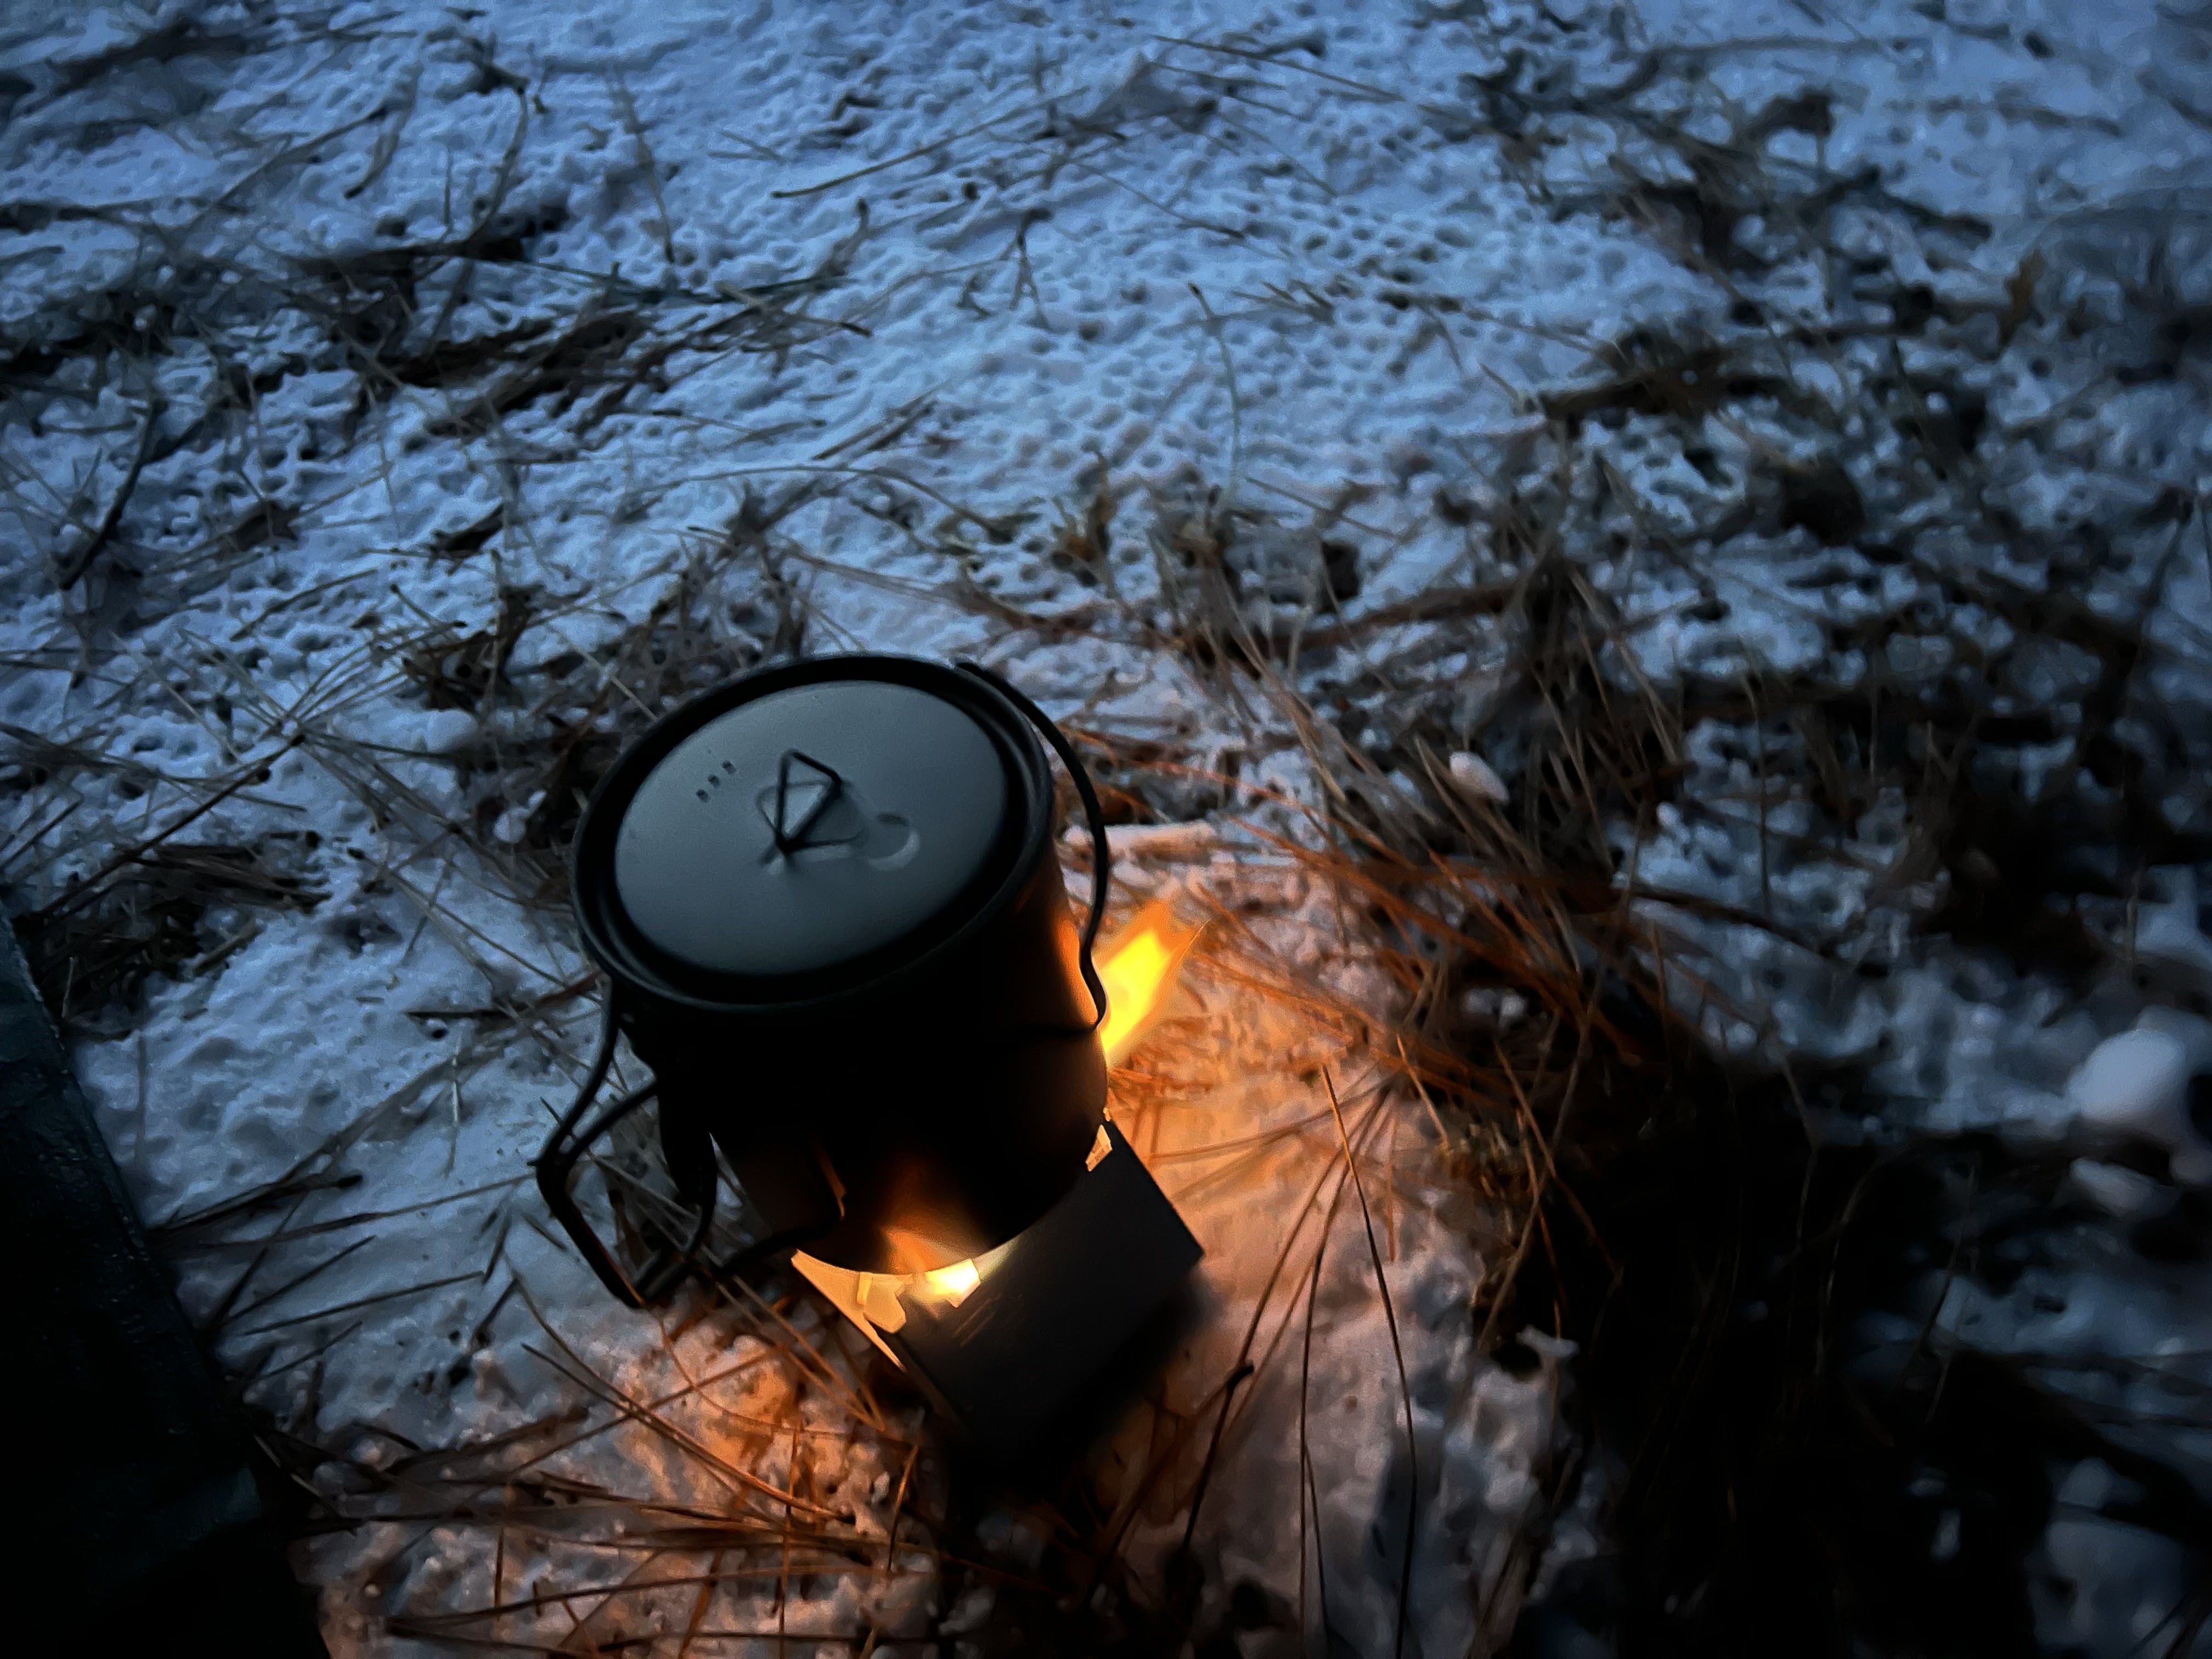 |
| It was easy to reach down from the hammock to fill the cup and light the Esbit fuel tab. In less extreme conditions I might even have had the water in the cup already. |
I did identify one serious potential problem using this setup for winter camping - where to put the water at night. The standard practice is to slip your canteens into your sleeping bag so they won't freeze. Not an issue when you're sleeping on the ground, but in the hammock it could be a problem. As everyone knows, "a pint's a pound the world around". I typically have at least a gallon of water on hand when I go to sleep, often more, so that would be anywhere from 8 lb. on up. If you're a big guy like me, putting all that weight in the hammock might not be a good idea. I'll have to think about this one.
I started to take everything inside on Saturday afternoon, but since snow was forecast for Sunday, I left the tarp and hammock set up with the "doors" closed. Sure enough, it started to snow early in the morning and continued until about noon. I could see the tarp blowing in the wind pretty steadily all morning. I went outside with a wind meter and measured it at 5(+) mph, gusting fairly regularly up to 15 mph. In the afternoon after it had stopped snowing, I went outside to see how the hammock and tarp had fared.
 |
| Despite the wind and blowing snow, the ground underneath the tarp stayed surprisingly clear. |
 |
| There was about an inch accumulation of snow outside, but no trace of any snow having touched the hammock (incidentally, I had attached the bug net to test the zipper, and left it on). There was a little ridge of snow around the edges where it had slid off the tarp. |
This is certainly not a setup for a full-blown mountain gale (someday I'll try out my Hilleberg Allak 2 in actual winter conditions!). But the closed-in configuration of the tarp certainly provided adequate protection in this case, and might have helped a little with warmth as well, had I been sleeping in the hammock.
All in all I am now a confirmed fan of the Haven XL hammock. I will leave their rain fly at home and use the Onewind Billow tarp instead. It will represent a little increase in weight for me, but I think the advantages far outweigh the disadvantages (no pun intended, but there it is, lol).
Speaking of weight, several people commented on a Facebook post I wrote that this system is too heavy for backpacking, so I'll address that issue in closing.
First of all, I am *not* an ultralight backpacker. While I am not oblivious to weight, I do take things along that other people would leave behind. If I want it, it goes, and so my pack is heavy. I am fine with that. I have a Frontier Gear of Alaska "Freighter" external frame with "Yukon" pack bag that is extremely comfortable.
When I first received these products, I weighed each component. Here are the weights as I recorded them:
*Hammock w/bug net: 2 lb., 2.4 oz. (34.4 oz.)
Hammock w/o bug net: (not weighed)
*Spreader bars (2): 10 oz.
Carabiners (2, included): 4.5 oz.
*Carabiners (2, ultralight): 1.6 oz. (I purchased Haven ultralight carabiners to replace the included ones)
*Tree straps (2): 5.2 oz.
*Whoopie slings (2): 1.7 oz.
*Stuff sacks: 3.6 oz.
*Air mattress (w/ stuff sack): 2 lb., 6.8 oz. (40 oz.)
Pump: 6.6 oz.
Ridge light: 3.7 oz. (Needs power source, can use pump for this)
Rainfly: 15.1 oz.
Stakes (4, included): 2.1 oz.
*Stakes (4, MSR groundhog): 2.0 oz.
Ropes & mini-carabiners for rainfly: 3.9 oz.
*Onewind Tarp w/ stuff sack: 1 lb. 5.5 oz. (21.5 oz)
*Ropes (4): 3.0 oz.
*Mini-carabiners (4): 0.4 oz.
Rope tensioners (4): 0.7 oz.
Stakes (4, included): 2.1 oz.
*Stakes (4, MSR groundhog): 2.0 oz.
Of the items on the above list, I will use only the items with an asterisk. I don't know if I will use six or only four of the ultralight carabiners - I am still working that out. I will probably also shave a few ounces by consolidating stuff sacks. But with six carabiners and eight stakes, the combined weight of the system will be:
Hammock et al: 99.1 oz. ( 6 lb 3.1 oz)
Tarp et al: 28.9 oz. (1 lb 12.9 oz)
Total weight: 128 oz (8 lb.)
Now, consider the weight of the items this setup will replace:
Tent (Nemo Dragonfly Bikepacker): 66 oz. (4 lb. 2 oz.)
(Purchased just last year to save weight by replacing my 7.5 lb. North Face Rock 22)
Thermarest Classic sleeping pad: 29.3 oz. (1 lb. 13.3 oz)
(I have tried lighter pads but found them uncomfortable and toboggan-like).
Thermarest chair: 10.7 oz.
(Now I'll sit in the hammock)
Total: 106 oz. (6 lb. 10 oz.)
Difference (Delta, for you scientific types): + 20 oz. (1 lb. 4 oz.)
So for one and a quarter lb. of additional weight, I get a virtually unlimited choice of campsites and can stop when I feel like it instead of walking on and on for miles, stopping early because I'm not sure if I'll find another place, or walking around examining the ground in a promising area wondering if I'll be sliding around all night if I set up 'here' vs. 'over there'.
That is a price I am willing to pay. 🙂👍
posted by Brad @ 15:35
0 comments
![]()
![]()

